Using Stripe with Angular (Deprecated)
Edit · Jul 5, 2016 · 6 minutes read · Follow @mgechev
The content in this post uses deprecated APIs
To learn about the latest version of the Stripe APIs check out their documentation page.
Stripe offer a set of APIs which allow businesses and individuals to easily accept and manage payments online. In a typical scenario you want your users to pay for a service that you’re offering using Stripe as a mediator.

On the other hand, Angular is gathering more and more popularity. A lot of developers are including the framework as part of their production applications.
In this blog post we will briefly describe what problems you may face using the Stripe APIs with Angular and how you can solve them.
So lets begin!
Sample Application
This app is based on the angular2-seed project. The complete demo is located here.
Above you can see two views:
- Default Stripe Form.
- Custom Stripe Form.
The first one demonstrates the default Stripe checkout mechanism and the second one gets the token for the entered credit card by using a custom form.
Stripe Checkout
Our end goal here is to add a button which triggers the default stripe checkout mechanism and visualizes a form for entering credit card information.
First, we need to add the checkout script which will expose the global variable StripeCheckout. Open index.html (notice do not add this script to any of your components’ templates because Angular will remove it), and add the following line:
<script src="https://checkout.stripe.com/checkout.js"></script>
As next step we need to add a button to our component’s template:
<h1>Default Stripe Form</h1>

<button (click)="openCheckout()">Purchase</button>
Notice that we also added a click handler to the button. Once the user clicks on the button, the openCheckout method defined in the component’s controller will be invoked.
Now lets take a look at the component’s controller implementation:
import { Component } from '@angular/core';

@Component({
  moduleId: module.id,
  selector: 'sd-stripe-form',
  templateUrl: 'stripe-form.component.html',
  styleUrls: ['stripe-form.component.css']
})
export class StripeFormComponent {

  openCheckout() {
    var handler = (<any>window).StripeCheckout.configure({
      key: 'pk_test_oi0sKPJYLGjdvOXOM8tE8cMa',
      locale: 'auto',
      token: function (token: any) {
        // You can access the token ID with `token.id`.
        // Get the token ID to your server-side code for use.
      }
    });

    handler.open({
      name: 'Demo Site',
      description: '2 widgets',
      amount: 2000
    });

  }

}
Once the user clicks on the button and the openCheckout method is invoked, we create a new Stripe handle. To the handle we pass configuration object, and right after that we invoke the open method of the handle! This will open our stripe checkout pop-up.
So far so good! The token callback that we pass with the handle’s configuration object will return the id of the token associated with the user’s card. This token can be used, for instance, server-side. You may experience some issues using it because of the way stripe sends requests to their APIs.
So now lets go to the next section and see what the issues with the token callback are and how we can deal with them.
Custom Stripe Form
The first step of the custom form integration is to add the following script in your index.html file:
<script type="text/javascript" src="https://js.stripe.com/v2/"></script>
Right after that we need to set your Stripe public key:
<script type="text/javascript">
  Stripe.setPublishableKey('pk_test_oi0sKPJYLGjdvOXOM8tE8cMa');
</script>
As next step lets take a look at the custom Stripe form. It is encapsulated in the CustomFormComponent:
import { Component } from '@angular/core';
import { REACTIVE_FORM_DIRECTIVES } from '@angular/forms';

@Component({
  moduleId: module.id,
  selector: 'sd-custom-form',
  templateUrl: 'custom-form.component.html',
  styleUrls: ['custom-form.component.css'],
  directives: [REACTIVE_FORM_DIRECTIVES]
})
export class CustomFormComponent {...}
…with the following template:
<h1>Custom Stripe Form</h1>

<form action="" method="POST" id="payment-form" (submit)="getToken()">
  <span class="payment-message">{{message}}</span>

  <div class="form-row">
    <label>
      <span>Card Number</span>
      <input [(ngModel)]="cardNumber" name="card-number" type="text" size="20" data-stripe="number">
    </label>
  </div>

  <div class="form-row">
    <label>
      <span>Expiration (MM/YY)</span>
      <input [(ngModel)]="expiryMonth" name="expiry-month" type="text" size="2" data-stripe="exp_month">
    </label>
    <span> / </span>
    <input [(ngModel)]="expiryYear" name="expiry-year" type="text" size="2" data-stripe="exp_year">
  </div>

  <div class="form-row">
    <label>
      <span>CVC</span>
      <input [(ngModel)]="cvc" name="cvc" type="text" size="4" data-stripe="cvc">
    </label>
  </div>

  <input type="submit" value="Submit Payment">
</form>
Notice that in our form we bind to the properties cardNumber, expiryMonth, expiryYear, cvc. Once the user fills the form, she can click on the Submit Payment button and the method getToken() will be invoked. Notice that in order to use [(ngModel)] each input should have a name.
As next step, lets take a look at the CustomFormComponent class. The most straightforward implementation looks like:
import { Component } from '@angular/core';
import { REACTIVE_FORM_DIRECTIVES } from '@angular/forms';

@Component({
  moduleId: module.id,
  selector: 'sd-custom-form',
  templateUrl: 'custom-form.component.html',
  styleUrls: ['custom-form.component.css'],
  directives: [REACTIVE_FORM_DIRECTIVES]
})
export class CustomFormComponent {
  cardNumber: string;
  expiryMonth: string;
  expiryYear: string;
  cvc: string;

  message: string;

  getToken() {
    this.message = 'Loading...';

    (<any>window).Stripe.card.createToken({
      number: this.cardNumber,
      exp_month: this.expiryMonth,
      exp_year: this.expiryYear,
      cvc: this.cvc
    }, (status: number, response: any) => {
      if (status === 200) {
        this.message = `Success! Card token ${response.card.id}.`;
      } else {
        this.message = response.error.message;
      }
    });
  }
}
As can be seen from the video above, the form behaves weirdly. Once we submit the credit card only the Loading... label shows and after that we need to change value in the form in order to see the response gotten from Stripe, once the request completes.
What actually happens is that:
- We send request to Stripe and respectively update the
messageto valueLoading.... - The request gets processed and we receive a response.
- Once we change an input value, we trigger the change detection mechanism which renders the response on the screen.
But why the change detection doesn’t get triggered after we get the response?
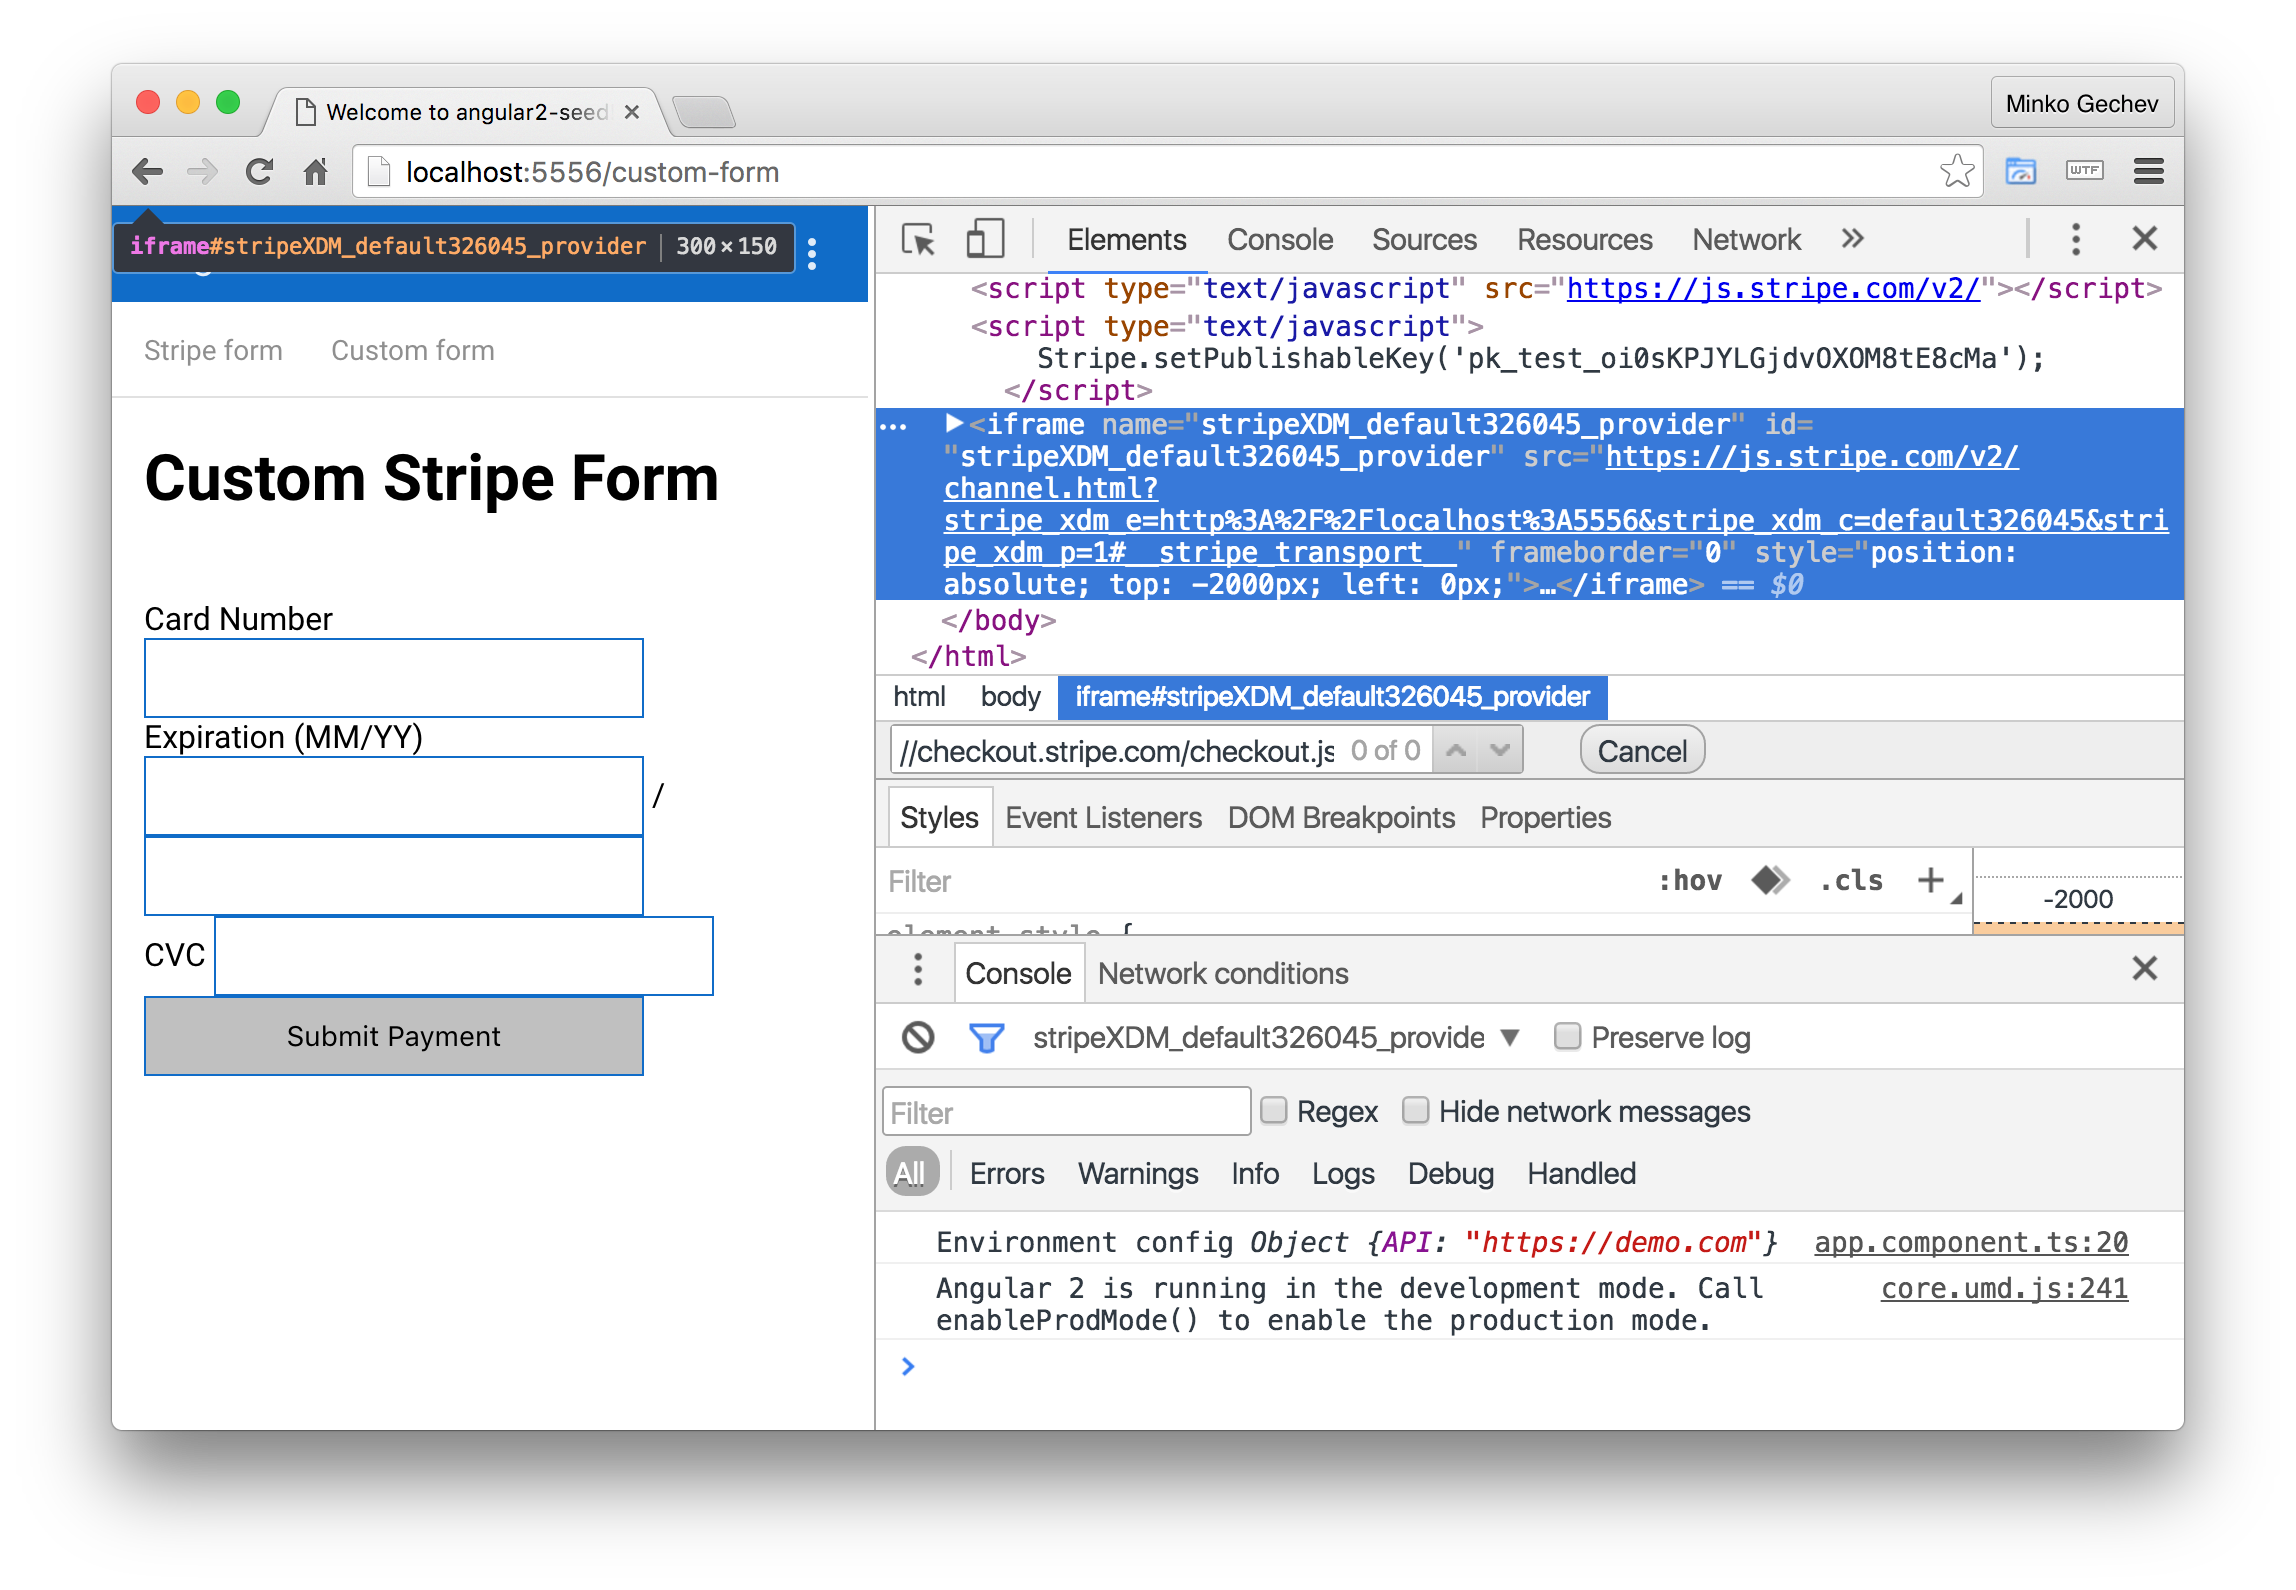
In the Zones…
The Angular Zones are monkey patching (almost) all asynchronous APIs! Zones intercept async events and triggering the change detection on special events. Zones take care of XMLHttpRequests, fetch, setTimeout, etc. However, Stripe uses hidden iframe for establishing requests to its API, instead of the APIs that zone.js takes care of:
In order to workaround this issue, we need to run the callback in the context of the Angular Zone (or NgZone). In order to do this we need to inject NgZone in the CustomFormComponent and slightly change getToken:
@Component(...)
export class CustomFormComponent {

  // Same properties declaration

  constructor(private _zone: NgZone) {}

  getToken() {
    this.message = 'Loading...';

    (<any>window).Stripe.card.createToken({
      number: this.cardNumber,
      exp_month: this.expiryMonth,
      exp_year: this.expiryYear,
      cvc: this.cvc
    }, (status: number, response: any) => {

      // Wrapping inside the Angular zone
      this._zone.run(() => {
        if (status === 200) {
          this.message = `Success! Card token ${response.card.id}.`;
        } else {
          this.message = response.error.message;
        }
      });
    });
  }
}
Conclusion
In this short blog post we described how we can easily use Stripe with Angular. We went through the default Stripe checkout and after that we built a custom form!
The only tricky thing that we found in the first part of our experiment was the sanitization of the components’ templates by Angular. It prevents us from using:
<form action="/charge" method="POST">
  <script
    src="https://checkout.stripe.com/checkout.js" class="stripe-button"
    data-key="pk_test_oi0sKPJYLGjdvOXOM8tE8cMa"
    data-amount="2000"
    data-name="Demo Site"
    data-description="2 widgets"
    data-image="/img/documentation/checkout/marketplace.png"
    data-locale="auto">
  </script>
</form>
and instead makes to be a bit more creative :-).
With the custom form we faced another issue related to not triggering the Angular change detection once we get the card token. We discovered that this is due the uncommon way Stripe performs the Ajax request for registering the user’s card.
We solved the issue simply by wrapping the callback inside of a zone.run(() => {...}) call!