Machine Learning-Driven Bundling. The Future of JavaScript Tooling.
Edit · Mar 18, 2018 · 31 minutes read · Follow @mgechev
In this article, I’ll introduce the early implementation of a few tools which based on techniques from the machine learning allow us to perform data-driven chunk clustering and pre-fetching for single-page applications. The purpose is to provide a zero-configuration mechanism which based on data from Google Analytics for the users’ behavior performs the most optimal build. We’re also going to introduce a webpack plugin which works with Angular CLI and Create React App.
Such tool can improve the user-perceived page load performance by making the build process of our applications data-driven! The final result is achieved by combining and/or pre-fetching JavaScript chunks which are most likely to be requested together in the same user session.
I want to thank Addy Osmani for the review and his feedback of the early drafts of this post and the described tools!
@mlx/* tools described here. More about Guess.js you can read here
Introduction
Over the past a couple of years, we started shipping web apps which provide a user experience comparable to the native applications. This wouldn’t be possible without all the advancements in the web platform. We have hundreds of new APIs which allow us to do what we’ve never thought would possible to achieve with JavaScript in the browser.
Of course, everything comes at a price. The complexity of the single-page applications is growing exponentially! Together with it is also growing the number of assets that we need to transfer over the network. There is a lot[1] of research[2] proving that the load time of our apps directly impacts the conversion rate and therefore our revenue.
It’s also clear that some assets are more expensive than others[3]. JavaScript compared to images, for instance, is much more expensive because of its non-trivial processing mechanism (parsing, compilation, and execution).
Well, slow pages are also stressful:
Waiting for slow web pages to load is as stressful as watching a horror movie: https://t.co/spwEC1P9ct #perfmatters pic.twitter.com/3JmcGPZij2
— Addy Osmani (@addyosmani) March 19, 2016
JavaScript Bundling
A common practice for dealing with a large amount of JavaScript is dividing it into multiple chunks and loading them on demand. There are two main approaches we can apply:
- Route-based code-splitting - the given JavaScript chunks correspond to one or more pages in the app. While the user navigates in the application they trigger network requests which download the chunk associated with the target route.
- Component-based code-splitting - imagine one of the pages contains a heavy widget which is not very likely to be used. We can simply move the associated JavaScript outside of the route chunk and download it on demand when the user intends to interact with the widget. This can be considered as a superset of the “route-based code-splitting” category but, as I’ll mention below, it’s convenient to put it into a different category.
There are brilliant tools, such as webpagetest[4] and Lighthouse[5], which tell us when we’ve done a poor job with the production build of our apps. After they give us a bunch of pointers, it’s our responsibility to fix the mess. One of the common warnings we get from Lighthouse, for instance, is that the JavaScript we include during the initial page load is too much. The logical approach is to apply either component- or route-based code-splitting, in order to delay the request for code which is not essential for the user’s initial interaction with the application.
Taking this approach, an interesting question to consider is: how do we decide which features and/or pages should be moved to their own chunks? Often, this decision is based on a completely subjective judgment. We subjectively decide that it’s unlikely the user to open a given page or interact with a given feature so we move it to its own chunk and download it lazily. There’s no point explaining how such a subjective judgment call could be completely irrelevant. Our users often behave in a way we don’t expect them to.
A better approach is to choose our chunk layout based on data. There are different platforms which provide us an insight into how the users behave. Google Analytics is a great example. Looking at a Google Analytics report, we can decide which pages should be grouped together and what we can load lazily. This way we can make the route-based code-splitting data-driven and respectively less error-prone.
For example, let’s suppose that the graph below represents data collected from Google Analytics. We can think of the nodes as the pages and of the edges as the transitions between them. The thicker given edge is, the more likely is the user to perform given transition. It makes logical sense to group the JavaScript from pages /a, /a/a, and /a/b into one chunk, the JavaScript from the pages /b and /b/a into another chunk, and leave the root into a third chunk.

We talked about grouping chunks (i.e. chunk clustering). Now let’s discuss pre-fetching.
Chunk Pre-Fetching
A few years ago I posted an article[6] on how we can consider our page as a state machine. Based on the transitions that the user performs while navigating in this state machine, we can decide which pages are likely to be visited next, so we can pre-fetch them. In my article, the priorities of the pages were arbitrary, based on my subjective judgment. Fortunately, with tools such as Google Analytics, we can set priorities much more accurately.
With this in mind, I decided to go one step further and based on an existing report, to develop a machine learning model for chunk pre-fetching. My idea was validated, got more accurate, and polished after going through the summary article for predictive fetching[7]
Thinking About What Matters
Obviously, data-driven chunk clustering and pre-fetching are both quite useful. The process of implementing them at the moment is manual and error-prone. On the other hand, computers are good in analyzing data based on models. Computers are also good in static analysis of code - it’s just a graph traversal. Let’s leave the bundler to decide what’s the best possible chunk layout and pre-fetching strategy based on the data we get from Google Analytics and the structure of our application! This way we can completely automate our data-driven build process and focus on what really matters.
In this blog post, I’ll demonstrate how combining a few tools we can automate the process of data-driven chunk clustering and data-driven pre-fetching. The packages[8] and the code[9] samples[10] can be found at my GitHub profile.
In the first a couple of sections, we’ll cover the individual tools from the mlx monorepo and explain how they work together. After that, we’ll dig into implementation details starting with an optional, theoretical introduction to the mathematical foundation of the project. Although, saying “mathematical foundation” may sound a bit frustrating, the covered topics are essential and it’s very likely you’re already familiar with them. We’re going to mention few algorithms from the graph theory and one popular machine learning model. Right after that, we’re going to define few concepts in order to make sure we speak the same language. Finally, in details, we’ll discuss how everything from @mlx works together.
Tooling Introduction
Disclaimer: the packages that we’re going to cover are in a very early stage of their development. It’s very likely that they are incompatible with your projects. Keep in mind that their APIs are not finalized. Over time their implementation will mature and get more robust.
The examples with the article use two identical Angular and React applications. The routing trees of these apps are the same as the routing tree of a production application that I’ve worked on in the past. The Google Analytics data used for the data-driven build is based on the original application.
The Angular application which uses the mlx package can be found here[9] and the React one here[10]. Both projects are ejected from the official CLI tools of the corresponding framework.
Let’s take a look at how we can use the tools in the contexts of both React and Angular.
First, clone the example of your choice:
# Angular example
git clone https://github.com/mgechev/ng-dd-bundled demo
# React example
git clone https://github.com/mgechev/react-dd-bundled demo
After that, install the dependencies of the project:
cd demo && npm i
As next step, let’s build the project:
npm run build
The last step is going to produce a non-minified build of the application. All we need to do now is serve the static assets. For the purpose, we can use the npm package serve. You can install it with:
npm i -g serve
Now run:
# For Angular
serve -s dist
# For React
serve -s build
When you open http://localhost:5000, you should see a screen similar to the gif below:
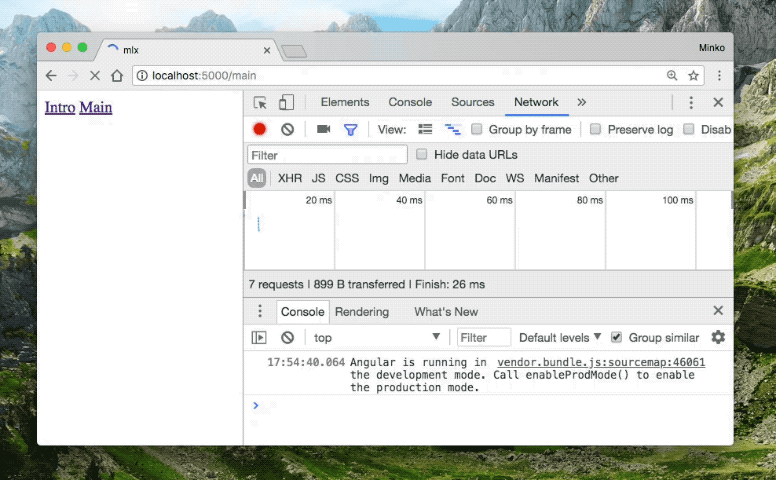
Notice that we have only lazy-loaded route definitions in both demos. This means that the browser will send a request over the network for each chunk corresponding to the route that the user navigates to. The build from the gif above is using the automated data-driven clustering and pre-fetching from mlx.
Notice that when the user navigates from “Parent” to “Settings” the browser doesn’t send an extra HTTP request to load the chunk associated with the “Settings” route. This is because the webpack plugin combined the “Settings” and the “Parent” chunks based on the Google Analytics data which we provided. Another interesting observation is that when we navigate to “Settings”, the application pre-fetches the “FAQ” module, together with the “Intro” module. Again, this is based on the data we got from Google Analytics which hints the tooling that after the user goes to “Settings” they will most likely visit “FAQ” or “Intro”.
Now, let’s look at the extra configuration that we’ve provided on top of the default Angular CLI/Create React App setup. Look at webpack.config.js for Angular CLI, and config/webpack.config.prod.js for the React project. You’ll notice the following lines:
...
const { MLPlugin } = require('@mlx/webpack');
const data = require('./data.json');
...
  new MLPlugin({ data })
...
Here data is a configuration property which contains processed data from Google Analytics. This data is extracted using @mlx/ga. A working example of the data extraction can be found here[11].
I’d encourage you to play with the examples. Keep in mind that the React one will work properly only if you follow strictly the route definition convention in the project. We’ll talk more about the limitations of the current React route parser in the @mlx/parser section of the project.
We’re going to dig in implementation details and what happens under the hood but before that, we’ll continue with the explanation of the mathematical foundation of the project.
Mathematical Background
You can expand this section to get familiar with the mathematical foundations of this article. Here we’re going to cover:
- Graphs, trees, weighted graphs, and connected components
- Probabilities and Markov chains


Definitions
To make sure we’re all on the same page with the concepts that we’re going to discuss, I want to start with a few definitions. The only pre-requirement for now is that each of the routes of the application will be lazy-loaded unless specified otherwise. This is just for simplicity, it’s not a restriction of the algorithms that we’re going to apply.
Let’s suppose we have an application with the pages /a, /a/a, /a/b, /b, and /c, with the following transitions between them:

Navigation Graph
The graph above we’ll call navigation graph. The individual nodes in the navigation graph are the pages of our application and the edges between them represent the transitions from one page to another. It’s important to mention that the navigation graph is directed. Usually, the edges between the individual nodes are represented by links in our application. This means that if we have an edge between /a and /b, we most likely have a link between these two pages. Of course, another way the user to navigate between /a and /b is by directly using the address bar of the browser. The navigation graph encapsulates both types of transitions.
We’re going to build the navigation graph from a Google Analytics report using the package @mlx/ga. We’ll cover this tool later in the article.
Page Graph
Although the navigation graph looks pretty handy, it’s not usable for our purposes because often our applications’ routes are parametrized. For example, let’s suppose we have the routes:
/a
/a/:id
/b
/c
In this case, if we’re interested in analyzing the application we most likely want to think of both /a/a and /a/b as /a/:id. The navigation graph, which contains aggregated information based on the routes of the application we’ll call a page graph, or a route graph. The navigation graph from above, translated to a page graph will look like:

Routing Tree
The declarations of the routes of the application form a tree-like structure. For example, we have the root route /, which has three children routes /a, /b, and /c. The route /a has a single child route /a/:id. This tree we’re going to call a routing tree.

Bundle Routing Tree
If we suppose that all the routes in the application are associated with entry points of chunks then our bundle tree’s shape matches the routing tree. The only difference is that the routing tree’s nodes will be named after the routes and the bundle routing tree’s nodes are going to be named after the entry points of the chunks.
Now let’s suppose we have the following route declarations:
// React
// app.tsx
<Route path="/a" component={AsyncComponent(() => import('./com'))} />
<Route path="/b" component={AsyncComponent(() => import('./com'))} />
<Route path="/c" component={AsyncComponent(() => import('./c'))} />
or in Angular:
// Angular
// app.ts
export const appRoutes: Routes = [
  {
    loadChildren: './com#A',
    path: 'a'
  },
  {
    loadChildren: './com#B',
    path: 'b'
  },
  {
    loadChildren: './c#C',
    path: 'c'
  }
];
In this case, the routing tree will differ from the bundle routing tree:
- The routing tree will have a single root node called
/with three children:/a,/b, and/c. - The bundle routing tree will have root node named after the file which contains the routes’ definitions (
app.tsfor Angular andapp.tsxfor React), and two children (for Angular -./comand./c, and for React -./com.tsxand./c.tsx). In this case, the routing tree and the bundle routing tree differ because two routes point to the same chunk entry point.

Bundle Page Graph
We already defined the page graph as the navigation graph which we got from given source with aggregated routes (Google Analytics, let’s say). If instead of the routes, we get the entry points of their corresponding chunks, we’ll get the bundle page graph.
Keep in mind that we may not have a one-to-one correspondence between chunk entry point and a route. This is possible in the case when not all the routes are loaded lazily. In such case, we need to combine several nodes from the page graph. If we form the bundle page graph from a weighted page graph, the bundle page graph will be weighted as well. The difference is that the weights of the edges going from a given chunk entry point will equal to the sum of the corresponding edges of the merged nodes from the page graph.
Technical Details
Now we understand all the mathematics behind the tool and we defined all the concepts. Let’s dig into some technical details!
If you look at the mlx monorepo[8], you will find the following four packages:
@mlx/ga- a module used to fetch structured information from Google Analytics. Keep in mind that the information coming from Google Analytics is not aware of our application parametrized routes, i.e. we get a navigation graph which we need to translate to a page graph.@mlx/gacan do this automatically for us, if we provide a list of all the paths in the application.@mlx/parser- a module which extracts the routes of our application, finds the associated chunk entry points of the lazy-loaded routes and builds the routing bundle tree. In other words, once we parse the application with the@mlx/parser, we’ll get an array with all the routes, their corresponding chunk entry points, and their parent chunk entry points.@mlx/cluster- a module which performs a clustering algorithm based on the data from Google Analytics and the bundle routing tree, which we got from@mlx/parser.@mlx/webpack- a set of webpack plugins which use@mlx/parserand@mlx/clusterin order to produce data-driven bundle layout for our application, and generate code for data-driven pre-fetching.
Let’s first explain how we can use @mlx/ga and how it works internally.
@mlx/ga
In the repository mlx-ga-demo[11], there’s an example which shows how this module can be used. Here’s the main file which illustrates the module’s API:
const { fetch } = require('@mlx/ga');
const { parseRoutes, ProjectType } = require('@mlx/parser');
const { writeFileSync } = require('fs');

// Credentials from the Google Console with access to the Google Analytics API
const key = require('./credentials.json');
// Google Analytics View ID
const viewId = '000000000';

const applicationRoutes = parseRoutes(
  '<Path_to_tsconfig.json>',
  ProjectType.Angular // or ProjectType.React
);

fetch({
  key,
  viewId,
  period: {
    startDate: new Date('YYYY-MM-DD'),
    endDate: new Date('YYYY-MM-DD')
  },
  formatter: r => r.replace('/app', ''),
  routes: applicationRoutes.map(f => f.path),
  expression: 'ga:sessions'
})
.then(g => writeFileSync('data.json', JSON.stringify(g, null, 2)));
In the snippet above we import fetch from @mlx/ga. That’s the only exported symbol from the package. The fetch method accepts an object holding the following data:
- Key for access to the Google Analytics API (you can find how to get it here[12]).
- Google Analytics View ID [12] for our application.
- Start and end dates for the Google Analytics report.
- Optional URL formatter. The URL formatter is a function which accepts the individual URLs coming from Google Analytics and performs manipulation over them. In the example above, it removes the
/appprefix from all of them. - Optional list of route names from our application. We can either provide them as an array, which we have manually collected or we can use
@mlx/parserin order to extract them automatically. This array is essential in order to allow@mlx/gato map the navigation graph to a page graph. - Google Analytics expression to be used for the weights of the navigation/page graph.
Internally, @mlx/ga will build the weighted page graph of the application. In case we don’t provide a list of the routes, the result of the invocation will be the weighted navigation graph. Internally, the tool will query Google Analytics’ API and get the previous page for each visited page, together with the number of visits (i.e. the variable associated with the provided expression). This way, in the end, we’ll have a graph similar to this one:
{
  "": {
    "/intro/parent": 144,
    "/intro": 36,
    "/intro/parent/personalize": 23,
    "/main/kid/question/:standard/:question/:id": 25,
    "/main/kid/question/:standard/:question": 4,
    "/main/kid/reports": 2,
  },
  "/intro": {
    "": 69,
    "/intro/parent": 18,
    "/main/kid/question/:standard/:question": 7,
    "/main/kid/question/:standard/:question/:id": 20,
    "/main/parent/home": 1,
    "/main/parent/settings": 2
  },
  "/intro/parent": {
    "/intro": 28,
    "": 17,
    "/intro/parent/info": 7,
    "/main/kid/question/:standard/:question/:id": 10,
  },
  // ...
}
This is stripped version of the graph that I used for developing the two examples for Angular[9] and React[10]. Here’s an interactive visualization of the entire aggregated data:
The thicker given edge is, the more likely it is the user to perform the corresponding transition. The graph from the visualization is intentionally undirected to make the diagram less noisy.
You can find demo of this module here[11]. As prerequirement, download your private key from the Google Developer Console, place it in credentials.json and replace the view ID with the one of your web app[12].
@mlx/webpack
Now, once we have collected the data from Google Analytics, we can plug @mlx/webpack in our build process. For the purpose, we should eject the Angular CLI application (or create-react-app one) and in webpack.config.js add the following lines:
const { MLPlugin } = require('@mlx/webpack');

plugins: [
  // ...
  new MLPlugin({ data: require('./path/to/data.json') })
  // ...
]
…and that’s it! Our application now will be bundled according to the data gotten from Google Analytics. There are a couple of magical things going on but before explaining them, let’s take a look at the detailed configuration of the MLPlugin:
// Configuration of the MLPlugin
export interface MLPluginConfig {
  debug?: boolean;
  data: Graph;
  routeProvider?: RouteProvider;
  runtime?: false | RuntimeConfig;
  build?: false | BuildConfig;
}

// Configuration of the RuntimePrefetchPlugin
export interface RuntimeConfig {
  basePath?: string;
  prefetchConfig?: PrefetchConfig;
}

// Configuration of the ClusterChunksPlugin
export interface BuildConfig {
  minChunks?: number;
  algorithm?: ClusteringAlgorithm;
}

export type Neighbors = { [key: string]: number };

// Represents the probability threshold for the different
// effective connection types.
export interface PrefetchConfig {
  '4g': number;
  '3g': number;
  '2g': number;
  'slow-2g': number;
}

export interface Graph {
  [key: string]: Neighbors;
}
debugindicates if the plugin’s verbose logging should be enabled.datais the page graph gotten from Google Analytics.routeProvideris a function which returns the mapping between routes and chunk entry points. If arouteProvideris not specified,@mlx/webpackwill use the default route provider implementation from@mlx/parser. This is extremely powerful configuration property. If you have a React application and the defaultrouteProviderdoesn’t work you can provide a custom function which returns the metadata:new MLPlugin({ data, routeProvider: () => [{...}, {...}] })runtimeconfigures the plugin for data-driven bundle pre-fetching. With this property, we can either specify an optionalbasePathand/orprefetchConfigor disable the pre-fetching completely.buildis the part of the@mlx/webpackplugin which by default groups the webpack chunks based on the clustering algorithm performed by@mlx/cluster. We can think of it as an algorithm which tries to reason from the provided data from Google Analytics which pages will be visited in the same session. Based on this information the plugin may group (integrate) some chunks together.
Keep in mind that the plugin will not do any code splitting. It relies that all your routes are loaded lazily and it may only group some of the corresponding chunks together depending on the provided data.
Custom Route Provider
As I mentioned, if routeProvider is not passed to the plugin configuration object, the default one will be used. The default route provider will return an array of objects in the following format:
interface RoutingModule {
  path: string;
  lazy: boolean;
  modulePath: string;
  parentModulePath: string;
}
In case the default route provider doesn’t work for you, you can implement a function which parses your application and returns the routes in the specified format. If an entire parser seems like an overhead for your application, you can even collect the metadata manually and return it as the result of a constant function:
const routeProvider = () => [
  { path: 'foo', lazy: true, modulePath: '/foo', parentModulePath: null },
  { path: 'bar', lazy: true, modulePath: '/bar', parentModulePath: '/foo' }
];
My recommendation would be to implement a parser in order to keep your application as the single source of truth (SSOT). You can find implementations of Angular and React parsers in the @mlx/parser package.
Performed Algorithm
Once the line new MLPlugin({ data: require('./path/to/data.json') }) gets evaluated, few steps will happen:
MLPluginwill check for arouteProvider. If it doesn’t discover such, it’ll try to guess your application type (i.e. Angular or React) by looking atpackage.jsonand try to discover thetsconfig.jsonfile of the project.- If it succeeds, it’ll invoke the
@mlx/parserand collect all the routes, the associated with them chunk entry points, and their parent chunk entry point. - It’ll initialize the
ClusterChunksPluginandRuntimePrefetchPlugin.
ClusterChunksPlugin is used for combining chunks and RuntimePrefetchPlugin is used for injecting a small piece of code which will make our application pre-fetch chunks based on the user’s behavior, the provided data from Google Analytics, and the user’s connection speed.
In other words, RuntimePrefetchPlugin performs predictive and adaptive pre-fetching.
Runtime Pre-Fetching
The RuntimePrefetchPlugin will generate a Markov Chain[14] model based on the generated weighted bundle page graph. For each route in the application, we’ll get a row from the matrix. For example:
{
  '/': [
    { chunk: 'b.js', probability: 0.7 },
    { chunk: 'a.js', probability: 0.3 }
  ],
  '/a': [
    { chunk: 'b.js', probability: 0.1 },
  ]
  '/a/:id': []
  '/b': [],
  '/b/a': [
    { chunk: 'a.js', probability: 1 },
  ],
}
In the example above, we can see that when the user is in page / there’s 0.7 probability the chunk b.js to be required next and 0.3 probability for the bundle a.js. Notice also that RuntimePrefetchPlugin gets the chunks in a sorted order by probability. Another feature of the plugin is that it’s going to have a different probability threshold depending on the user’s connection speed. For example, if the user has effective speed 4g, we’ll download all chunks which probability is over 0.15, if the user is with 3g we will download only chunks with probability over 0.3, etc.
RuntimePrefetchPlugin can be configured with the following options:
export interface PrefetchConfig {
  '4g': number;
  '3g': number;
  '2g': number;
  'slow-2g': number;
}

export interface RuntimePrefetchConfig {
  debug?: boolean;
  data: Graph;
  basePath?: string;
  prefetchConfig?: PrefetchConfig;
  routes: RoutingModule[];
}
The graph passed here is the Google Analytics graph we got from @mlx/ga (i.e., either a navigation or a page graph). The routes array contains one object per route. Each object has a modulePath of the chunk entry point associated with the given route, parentModulePath which equals the path of the entry point of the parent module, and a path which equals to the route that this object represents.
prefetchConfig is also configurable! It contains the pre-fetching thresholds depending on the value of window.navigator.connection.effectiveType. Since connection.effectiveType is currently supported only by Chrome, the plugin will use the 3g thresholds by default.
How Pre-Fetching Works
Currently, when given chunk needs to be pre-fetched, the plugin will create a new link element with rel="prefetch"[13] and href attribute equal to the path to the chunk. This element will be added as child element to the head element, or the parent of the first script item in the page in case the head doesn’t exist. Using this technique allows the browser to prioritize the pre-fetching process.
In order to get a better understanding of the process, let’s quickly look at the animation below.
The shadow around a node represents the current page the user is at. The black border represents the nodes which are downloaded and available in the browser’s cache. For the purpose of the example, we suppose that we have three chunks root.js (for the assets in /), a.js (for the assets in /a, /a/:id), and b.js (for /b, /b/a). Our second assumption in the example is that the probability threshold is 0.5.
Here’s the flow of events:
- First, the user visits the
/page. The algorithm will look at the Markov chain and iterate over the elements. The algorithm will discover thatb.jshas0.7probability to be needed next, so it’ll insert alink[rel="prefetch"]withhref="b.js"to the page. - After that, the user navigates to
/b. Since/band/b/aare already in the same bundle, and there are no other edges going from/b, nothing is going to happen. - When the user navigates to
/b/a, the algorithm will look at the last row of the matrix and find that chunka.jshas1probability to be downloaded. This will trigger the pre-fetching process fora.jswhich contains the assets from/aand/a/:id.
Keep in mind that we’re ignoring the page leaves.
Activity:
| / | /a | /a/:id | /b | /b/a | |
| / | 0 | 0.3 | 0 | 0.7 | 0 |
| /a | 0 | 0 | 0.9 | 0.1 | 0 |
| /a/:id | 0 | 1 | 0 | 0 | 0 |
| /b | 0 | 0 | 0 | 0 | 1 |
| /b/a | 0 | 1 | 0 | 0 | 0 |
The module that we’re going to take a look at next is @mlx/parser.
@mlx/parser
This package is optional for both - @mlx/webpack and @mlx/ga but it’s also quite convenient. The parser does two key things:
- Finds the route declarations in our application. This allows us to aggregate the navigation graph that we get from Google Analytics and transform it into a page graph.
- Finds the entry points of the routing bundles and their parent modules.
Although we can do this manually, it’s still much more convenient to use @mlx/parser because your application’s source code will always be the single source of truth.
The second point is crucial for the work of @mlx/webpack and @mlx/cluster. Once we provide a project type and a tsconfig.json file to @mlx/parser’s parseRoutes method, it’ll automatically extract all the metadata and populate it into a JavaScript array of the form:
[
  {
    path: '/main',
    modulePath: '/home/foo/Projects/ng-dd-bundled/src/app/main/main.module.ts',
    lazy: true,
    parentModulePath: '/home/foo/Projects/ng-dd-bundled/src/app/app.module.ts'
  },
  {
    path: '/main/parent',
    modulePath: '/home/foo/Projects/ng-dd-bundled/src/app/main/parent/parent.module.ts',
    lazy: true,
    parentModulePath: '/home/foo/Projects/ng-dd-bundled/src/app/main/main.module.ts'
  },
  {
    path: '/intro/parent/reward/:id',
    modulePath: '/home/foo/Projects/ng-dd-bundled/src/app/intro/intro-parent/intro-reward/intro-reward.module.ts',
    lazy: true,
    parentModulePath: '/home/foo/Projects/ng-dd-bundled/src/app/intro/intro-parent/intro-parent.module.ts'
  }
  // ...
]
This is stripped version of the array produced after parsing the sample Angular project[9]. There are several important things to notice:
- The array contains the routes from our definitions. This means that the parameterized routes look the way we define them in the source code.
- Each array element has a
modulePathproperty which points to the entry point of the JavaScript chunk which will be loaded when the user navigates to the givenpath. - Each element also has a
parentModulePath. This is the entry point of the chunk which contains the actual route definition. For non-lazy routes, themodulePathwill have the same value as theparentModulePath.
You can find the Angular and the React parsers of @mlx/parser here[15].
Both parsers perform static analysis. The Angular parser uses an abstraction on top of the Angular compiler - ngast[16]. For now, the React parser relies on a lot of syntactical conventions. It’s built on top of TypeScript.
@mlx/cluster
The final package that we’re going to cover is the clustering algorithm. As input, it accepts:
bundleGraph: Graph- a weighted bundle page graph which is the result of the transformation of the weighed page graph.modules: Module[]- since thebundleGraphcan represent only a partial part of the entire application (because of limited information from Google Analytics, for example), we need the entry points of the lazy-loaded chunks and their parents to be provided separately. This is the bundle page graph that we defined above.n: number-nis the minimum number of chunks that we want to get at the end of the clustering algorithm.
Once this information is available, the clustering algorithm will:
- Try to find the connected components in the
bundleGraph. - In case the connected components are more than the minimum, the algorithm will return them.
- In case the connected components are less than the minimum, the algorithm will find the edge with the smallest weight, and subtract it from all other edges.
- After that the algorithm will go back to step 1. and repeat the procedure until it finds a clustering of the graph satisfying
n.
For finding the connected components in the graph, the current implementation uses Tarjan’s algorithm[17].
Conclusion
In this blog post, we introduced the idea of data-driven chunk clustering and pre-fetching. We explained how we can apply it by consuming aggregated data from one of the most popular services for web application analysis - Google Analytics.
After that, we did a brief introduction to graph theory and the probability theory. As next step, we defined a common terminology for the variety of graphs used in the @mlx packages. Stepping on this solid foundation we explained the implementation of data-driven clustering and pre-fetching at @mlx.
As mentioned previously, the demonstrated packages are still in early stage of their development. The list of short-term goals include:
- More robust and generic parser for React router
- Improvement of the clustering heuristics (for example, do not combine chunks over given size threshold)
- Reduced chunk over fetching
- Estimation of proper probability thresholds for the different effective connection types
The future goals of the project include more personalized bundle pre-fetching and clustering. For example, different pre-fetching strategies depending on features of the users (geolocation, navigation history, etc). This will require the development of a more sophisticated machine learning model based on hidden Markov chains[18].
Regarding clustering of the chunks, it might not be practical to provide a personalized build of the application for each individual user. This will require a lot of computational resources and storage. On the other hand, performing clustering of the users (using k-means[19], for example) based on their features and providing a personalized build to each group (or the highly valued groups) is realistic.
References
- Why marketers should care about mobile page speed - https://business.google.com/us/think/
- How Page Load Time Affects Conversion Rates: 12 Case Studies - https://blog.hubspot.com/marketing/page-load-time-conversion-rates
- The Cost Of JavaScript - https://medium.com/dev-channel/the-cost-of-javascript-84009f51e99e
- WebPageTest - https://www.webpagetest.org/
- Lighthouse - https://developer.chrome.com/docs/lighthouse/overview/
- Lazy prefetching of AngularJS partials - https://blog.mgechev.com/2013/10/01/angularjs-partials-lazy-prefetching-strategy-weighted-directed-graph/
- Predictive Fetching - https://github.com/addyosmani/predictive-fetching
- mlx - https://github.com/mgechev/mlx
- mlx Angular demo - https://github.com/mgechev/guess-js-angular-demo
- mlx React demo - https://github.com/mgechev/guess-js-react-demo
- mlx Google Analytics demo - https://github.com/mgechev/mlx-ga-demo
- Using the Google Analytics Core Reporting API from Node.js - https://2ality.com/2015/10/google-analytics-api.html
- Preload, Prefetch And Priorities in Chrome - https://medium.com/reloading/preload-prefetch-and-priorities-in-chrome-776165961bbf
- Markov Chains - https://en.wikipedia.org/wiki/Markov_chain
- mlx parser - https://github.com/mgechev/mlx/tree/master/packages/parser
- ngast - https://github.com/mgechev/ngast
- Tarjan’s strongly connected components algorithm - https://en.wikipedia.org/wiki/Tarjan%27s_strongly_connected_components_algorithm
- Hidden Markov Chains - https://en.wikipedia.org/wiki/Hidden_Markov_model
- k-means clustering - https://en.wikipedia.org/wiki/K-means_clustering